AI For Good and Evil in Lightroom Classic – Part 1 – Point Color and Lens Blur Demystified
$21
Already purchased? View Purchases.
ON DEMAND PRODUCT
Description
CLASS DETAILS
Runtime: 1 hour 7 minutes | Up to 1440p (2K) Resolution | Speed Control (.5 – 2x) | Interactive Chapter Markers | Bonus Downloadable Practice Files and Resources Included
CLASS OVERVIEW
Covering the big new features in Lightroom Classic Version 13. How to Edit Smarter Using AI Superpowers in Lightroom Classic. Two mighty new AI features in Lightroom Classic – Point Color and Lens Blur – will change the way you shoot and edit forever. The world’s your oyster when you master 3-D color selections and granular control over focus, blur, and bokeh. It’s wacko! It’s wonderful! AI might indeed be pure evil, but the results are soooo good! Learn how to harness the very real power of artificial intelligence in your Develop Module workflow!
LIGHTROOM CLASSIC VERSION INFO
This class teaches techniques unique to Lightroom Classic Version 13 or Later. Please make sure you’ve updated your Creative Cloud version of Lightroom Classic to version 13.0 or later to best take advantage of this On Demand.
CHAPTERS
00:00:08 – How Smart is Adobe’s Artificial Intelligence?
00:02:35 – What AI Currently Works?
00:04:16 – The Best Order to Use These Features
00:13:05 – Introduction to the Color Mixer Tools
00:15:20 – Refinement vs Enhancement
00:16:32 – Selecting Color in the Point Color Interface
00:18:16 – The Enhancement Sliders
00:18:35 – The Refinement Sliders
00:19:13 – The Visualize Range Checkbox
00:24:00 – Real Life Underwater Exampe with Point Color
00:24:18 – Mixer vs. Point Color – Example 1
00:25:51 – Refining the Selection – Example 1
00:27:42 – Enhancing the Selection – Example 1
00:29:45 – Mixer vs. Point Color – Example 2
00:34:06 – Making Additional Swatch Selections
00:37:24 – How to Remove Swatches
00:37:42 – Point Color in the Masking Panel
00:38:17 – Make a Mask First
00:39:22 – Point Color – Example 3
00:42:01 – Using the Eyeball to Preview the Change
00:43:38 – Introduction to Lens Blur
00:45:20 – How Adobe Makes Lens Blur Work
00:46:38 – Getting Started – Check the Apply Box
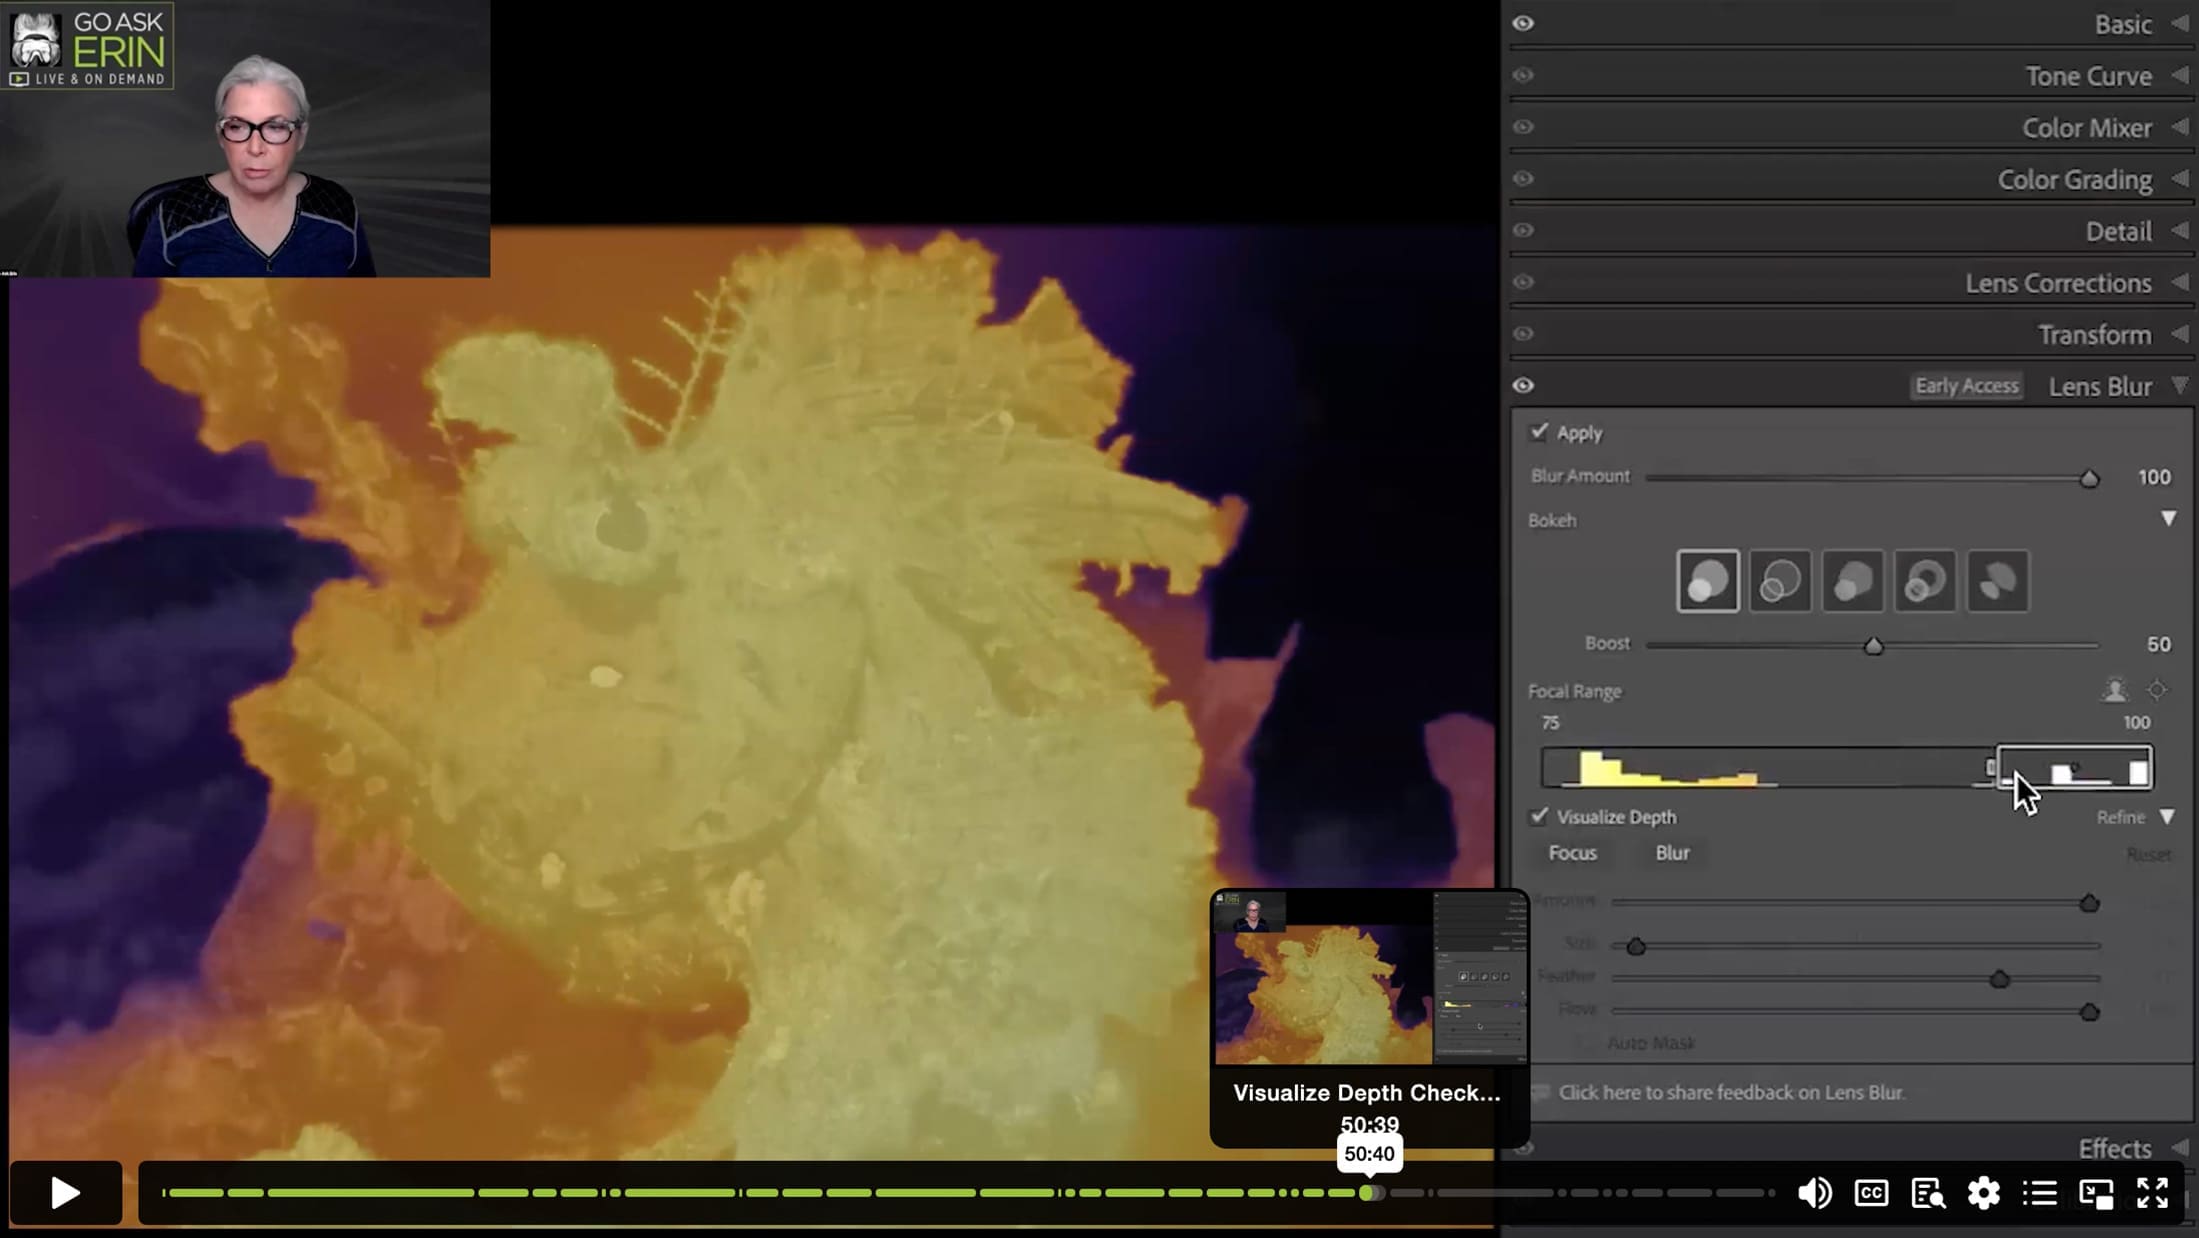
00:47:10 – The Lens Blur Tools
00:47:39 – The Boheh Panel
00:48:43 – Focal Range Slider (Changing Focus)
00:50:00 – Visualize Depth Checkbox
00:51:19 – Manually Selecting the Focal Range
00:52:55 – Adjusting Depth of Field
00:53:19 – Brushing in Focus or Blur
00:58:21 – Don’t Just Cutout Your Image – Check Your Work
00:58:55 – Adding Grain Back Into Your Background
01:00:15 – Lens Blur – Example 2
01:00:47 – Marquee Selecting Focus – Lens Blur (Thanks Doug!)
01:01:29 – Lens Blur – Example 3
01:02:56 – What Not to Do
01:05:01 – Tip: The Mask Amount Slider
01:07:11 – Thank You from Erin, Joel & Jen
© Go Ask Erin / Newmediasoup, LLC
Description
CLASS DETAILS
Runtime: 1 hour 7 minutes | Up to 1440p (2K) Resolution | Speed Control (.5 – 2x) | Interactive Chapter Markers | Bonus Downloadable Practice Files and Resources Included
CLASS OVERVIEW
Covering the big new features in Lightroom Classic Version 13. How to Edit Smarter Using AI Superpowers in Lightroom Classic. Two mighty new AI features in Lightroom Classic – Point Color and Lens Blur – will change the way you shoot and edit forever. The world’s your oyster when you master 3-D color selections and granular control over focus, blur, and bokeh. It’s wacko! It’s wonderful! AI might indeed be pure evil, but the results are soooo good! Learn how to harness the very real power of artificial intelligence in your Develop Module workflow!

LIGHTROOM CLASSIC VERSION INFO
This class teaches techniques unique to Lightroom Classic Version 13 or Later. Please make sure you’ve updated your Creative Cloud version of Lightroom Classic to version 13.0 or later to best take advantage of this On Demand.
CHAPTERS
00:00:08 – How Smart is Adobe’s Artificial Intelligence?
00:02:35 – What AI Currently Works?
00:04:16 – The Best Order to Use These Features
00:13:05 – Introduction to the Color Mixer Tools
00:15:20 – Refinement vs Enhancement
00:16:32 – Selecting Color in the Point Color Interface
00:18:16 – The Enhancement Sliders
00:18:35 – The Refinement Sliders
00:19:13 – The Visualize Range Checkbox
00:24:00 – Real Life Underwater Exampe with Point Color
00:24:18 – Mixer vs. Point Color – Example 1
00:25:51 – Refining the Selection – Example 1
00:27:42 – Enhancing the Selection – Example 1
00:29:45 – Mixer vs. Point Color – Example 2
00:34:06 – Making Additional Swatch Selections
00:37:24 – How to Remove Swatches
00:37:42 – Point Color in the Masking Panel
00:38:17 – Make a Mask First
00:39:22 – Point Color – Example 3
00:42:01 – Using the Eyeball to Preview the Change
00:43:38 – Introduction to Lens Blur
00:45:20 – How Adobe Makes Lens Blur Work
00:46:38 – Getting Started – Check the Apply Box
00:47:10 – The Lens Blur Tools
00:47:39 – The Boheh Panel
00:48:43 – Focal Range Slider (Changing Focus)
00:50:00 – Visualize Depth Checkbox
00:51:19 – Manually Selecting the Focal Range
00:52:55 – Adjusting Depth of Field
00:53:19 – Brushing in Focus or Blur
00:58:21 – Don’t Just Cutout Your Image – Check Your Work
00:58:55 – Adding Grain Back Into Your Background
01:00:15 – Lens Blur – Example 2
01:00:47 – Marquee Selecting Focus – Lens Blur (Thanks Doug!)
01:01:29 – Lens Blur – Example 3
01:02:56 – What Not to Do
01:05:01 – Tip: The Mask Amount Slider
01:07:11 – Thank You from Erin, Joel & Jen
© Go Ask Erin / Newmediasoup, LLC


