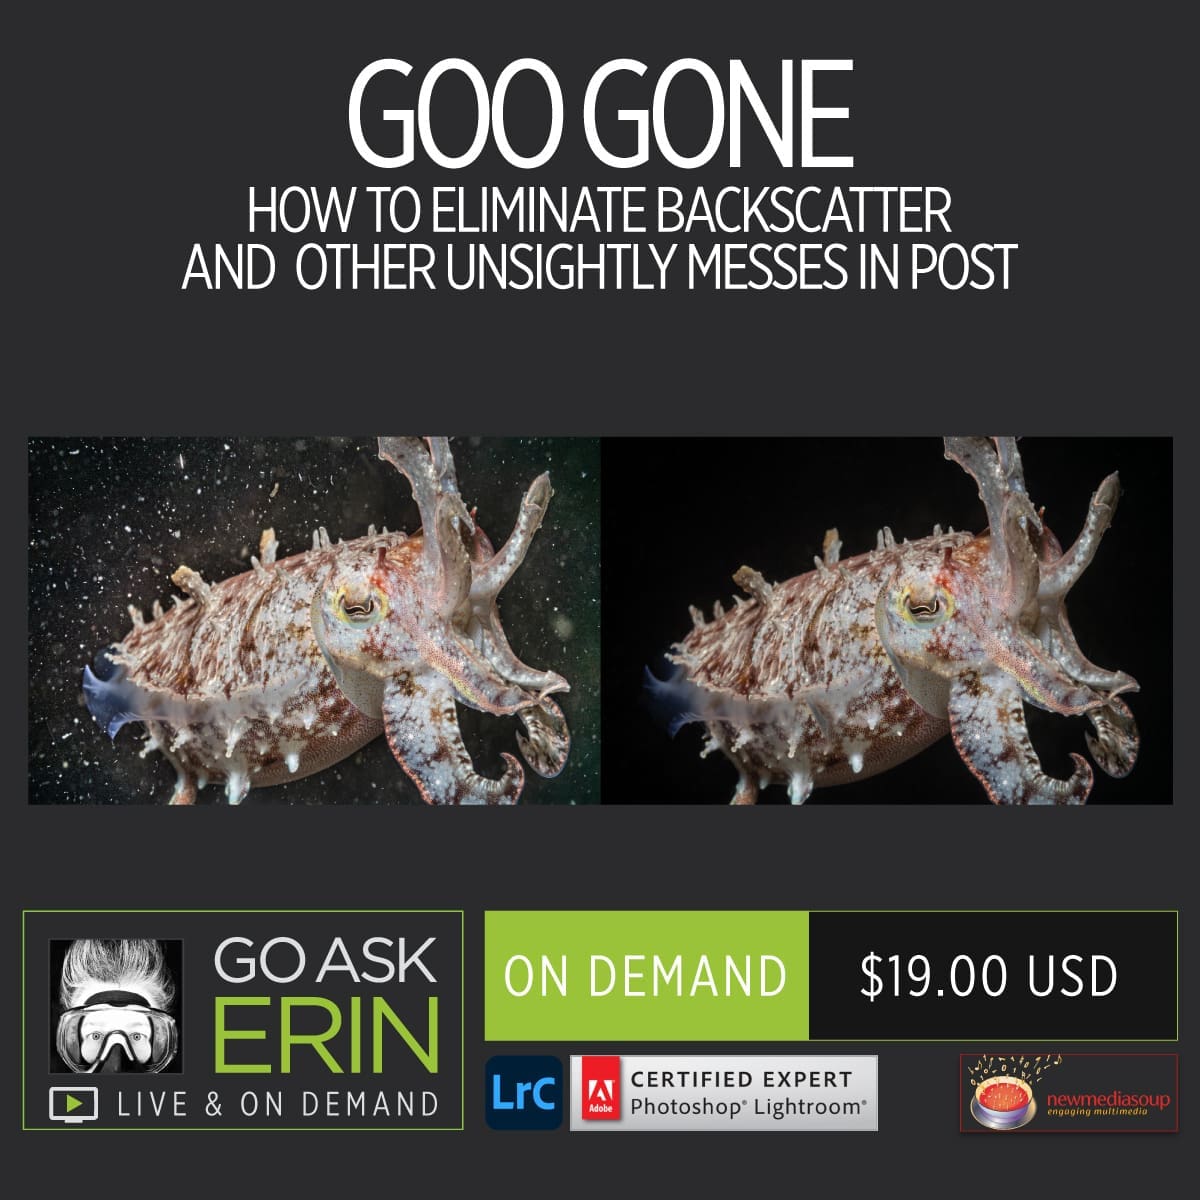
Goo Gone – How to Eliminate Backscatter and Other Unsightly Messes in Post
$19
Special Covid-19 Pricing.
Already purchased? View Purchases.
ON DEMAND PRODUCT
Description
CLASS DETAILS
Runtime: 1 hour 42 minutes | Up to 1440p (2K) Resolution | Speed Control (.5 – 2x) | Interactive Chapter Markers | Bonus Downloadable Practice Files and Resources Included
CLASS OVERVIEW
Blobs. Boo-boos. Blech. Backscatter is the bane of every underwater photographer, and there’s no magic bullet to take care of it all at once. Mastery of spot removal comes from knowing as many techniques as possible, and the right time to use them. In this session, we’ll start with some image-specific but effective techniques in Lightroom, then cross over to Photoshop and load up the big guns to heal, patch, blur, spin, fill, clone and mask away the mess.
 LIGHTROOM CLASSIC VERSION INFO
In Lightroom Classic Version 11 and Later, Adobe introduced a new way to make selections and masks in the Lightroom Develop Module. If you’re using Lightroom Classic 11 or Later, we recommend purchasing New Masking Magic in Lightroom Classic 11 in addition to this product to get up to speed on the new masking tools.
CHAPTERS
00:00:10 – Erin’s Rant About Backscatter
00:01:14 – Types of Backscatter
00:03:41 – Texture Awareness
00:05:30 – Backscatter and Dark Images
00:07:15 – Approaching Spot Removal in Lightroom
00:08:58 – Using Clarity to Emphasize Translucent Subjects
00:09:57 – Fine Tuning the Adjustment Brush for Details
00:11:29 – Checking Your Work
00:13:31 – The Spot Removal Tool in Lightroom
00:14:44 – Don’t Be a HO, Remember H O!
00:18:29 – Heal vs Clone Spot Removal in LR
00:21:05 – Dealing with “Dusty” Corners
00:25:11 – Erasing Part of a Filter
00:26:33 – White Balance and Backscatter
00:34:50 – Spot Removal with Range Masking in LR
00:40:48 – Adding Grain to Unify Edits in LR
00:42:13 – Jumping to Photoshop
00:44:42 – Blurring to Remove Backscatter in PS
00:47:13 – How to Use a Layer Mask in PS
00:54:10 – Using Surface Blur to Remove Backscatter
00:58:54 – The Patch Tool in PS
01:07:23 – Getting Rid of Glow
01:10:20 – Smart Object Workflow
01:13:10 – Using Clean Water to Fix Dirty Water
01:14:02 – Using Transform in PS
01:15:21 – Using a Layer Mask to Adjust Light Rays
01:16:49 – Creating and Using a Group in PS
01:17:59 – Using Quick Selection to Make a Mask
01:18:55 – Adding To or Subtracting From a Selection
01:20:08 – Saving a Selection in PS
01:20:46 – Using a Layer Mask in PS, Redux
01:23:58 – Blurring a Layer Mask in PS
01:27:48 – Removing Backscatter within Light Rays
01:28:24 – Blending Modes
01:29:25 – Stamp Tool in Darker Color Blending Mode
01:32:17 – Sky Replacement aka Water Replacement in PS
01:36:49 – Loading Water Replacement Images
© Go Ask Erin / Newmediasoup, LLC
Description
CLASS DETAILS
Runtime: 1 hour 42 minutes | Up to 1440p (2K) Resolution | Speed Control (.5 – 2x) | Interactive Chapter Markers | Bonus Downloadable Practice Files and Resources Included
CLASS OVERVIEW
Blobs. Boo-boos. Blech. Backscatter is the bane of every underwater photographer, and there’s no magic bullet to take care of it all at once. Mastery of spot removal comes from knowing as many techniques as possible, and the right time to use them. In this session, we’ll start with some image-specific but effective techniques in Lightroom, then cross over to Photoshop and load up the big guns to heal, patch, blur, spin, fill, clone and mask away the mess.
 LIGHTROOM CLASSIC VERSION INFO
In Lightroom Classic Version 11 and Later, Adobe introduced a new way to make selections and masks in the Lightroom Develop Module. If you’re using Lightroom Classic 11 or Later, we recommend purchasing New Masking Magic in Lightroom Classic 11 in addition to this product to get up to speed on the new masking tools.
CHAPTERS
00:00:10 – Erin’s Rant About Backscatter
00:01:14 – Types of Backscatter
00:03:41 – Texture Awareness
00:05:30 – Backscatter and Dark Images
00:07:15 – Approaching Spot Removal in Lightroom
00:08:58 – Using Clarity to Emphasize Translucent Subjects
00:09:57 – Fine Tuning the Adjustment Brush for Details
00:11:29 – Checking Your Work
00:13:31 – The Spot Removal Tool in Lightroom
00:14:44 – Don’t Be a HO, Remember H O!
00:18:29 – Heal vs Clone Spot Removal in LR
00:21:05 – Dealing with “Dusty” Corners
00:25:11 – Erasing Part of a Filter
00:26:33 – White Balance and Backscatter
00:34:50 – Spot Removal with Range Masking in LR
00:40:48 – Adding Grain to Unify Edits in LR
00:42:13 – Jumping to Photoshop
00:44:42 – Blurring to Remove Backscatter in PS
00:47:13 – How to Use a Layer Mask in PS
00:54:10 – Using Surface Blur to Remove Backscatter
00:58:54 – The Patch Tool in PS
01:07:23 – Getting Rid of Glow
01:10:20 – Smart Object Workflow
01:13:10 – Using Clean Water to Fix Dirty Water
01:14:02 – Using Transform in PS
01:15:21 – Using a Layer Mask to Adjust Light Rays
01:16:49 – Creating and Using a Group in PS
01:17:59 – Using Quick Selection to Make a Mask
01:18:55 – Adding To or Subtracting From a Selection
01:20:08 – Saving a Selection in PS
01:20:46 – Using a Layer Mask in PS, Redux
01:23:58 – Blurring a Layer Mask in PS
01:27:48 – Removing Backscatter within Light Rays
01:28:24 – Blending Modes
01:29:25 – Stamp Tool in Darker Color Blending Mode
01:32:17 – Sky Replacement aka Water Replacement in PS
01:36:49 – Loading Water Replacement Images
© Go Ask Erin / Newmediasoup, LLC


